Castled SDK can be integrated into your iOS project using either CocoaPods or Swift Package Manager (SPM), two of the most popular dependency managers in the iOS ecosystem. Below, you’ll find step-by-step instructions for both methods.Documentation Index
Fetch the complete documentation index at: https://docs.castled.io/llms.txt
Use this file to discover all available pages before exploring further.
Installation with CocoaPods
CocoaPods is a dependency manager for Swift and Objective-C Cocoa projects. CocoaPods is built with Ruby and is installable with the default Ruby available on macOS. Prerequisites Before you begin, ensure you have CocoaPods installed on your system. If you haven’t, you can install it by running the following command in your terminal:- Navigate to your project directory in the terminal and run the following command to create a Podfile if you don’t already have one:
- Open your Podfile using a text editor and specify the CastledNotificationContent pod within your target:
- Save the Podfile and run the following command in the terminal to install the SDK:
- After the installation is complete, make sure to open the .xcworkspace file created by CocoaPods, as it includes all the necessary dependencies and configurations.
- Build your project to ensure the SDK is integrated properly.
Installation with Swift Package Manager (Xcode 11+)
Swift Package Manager (SwiftPM) is a tool for managing the distribution of Swift code as well as C-family dependency. From Xcode 11, SwiftPM got natively integrated with Xcode. Integration via Xcode GUI- Open your project in Xcode.
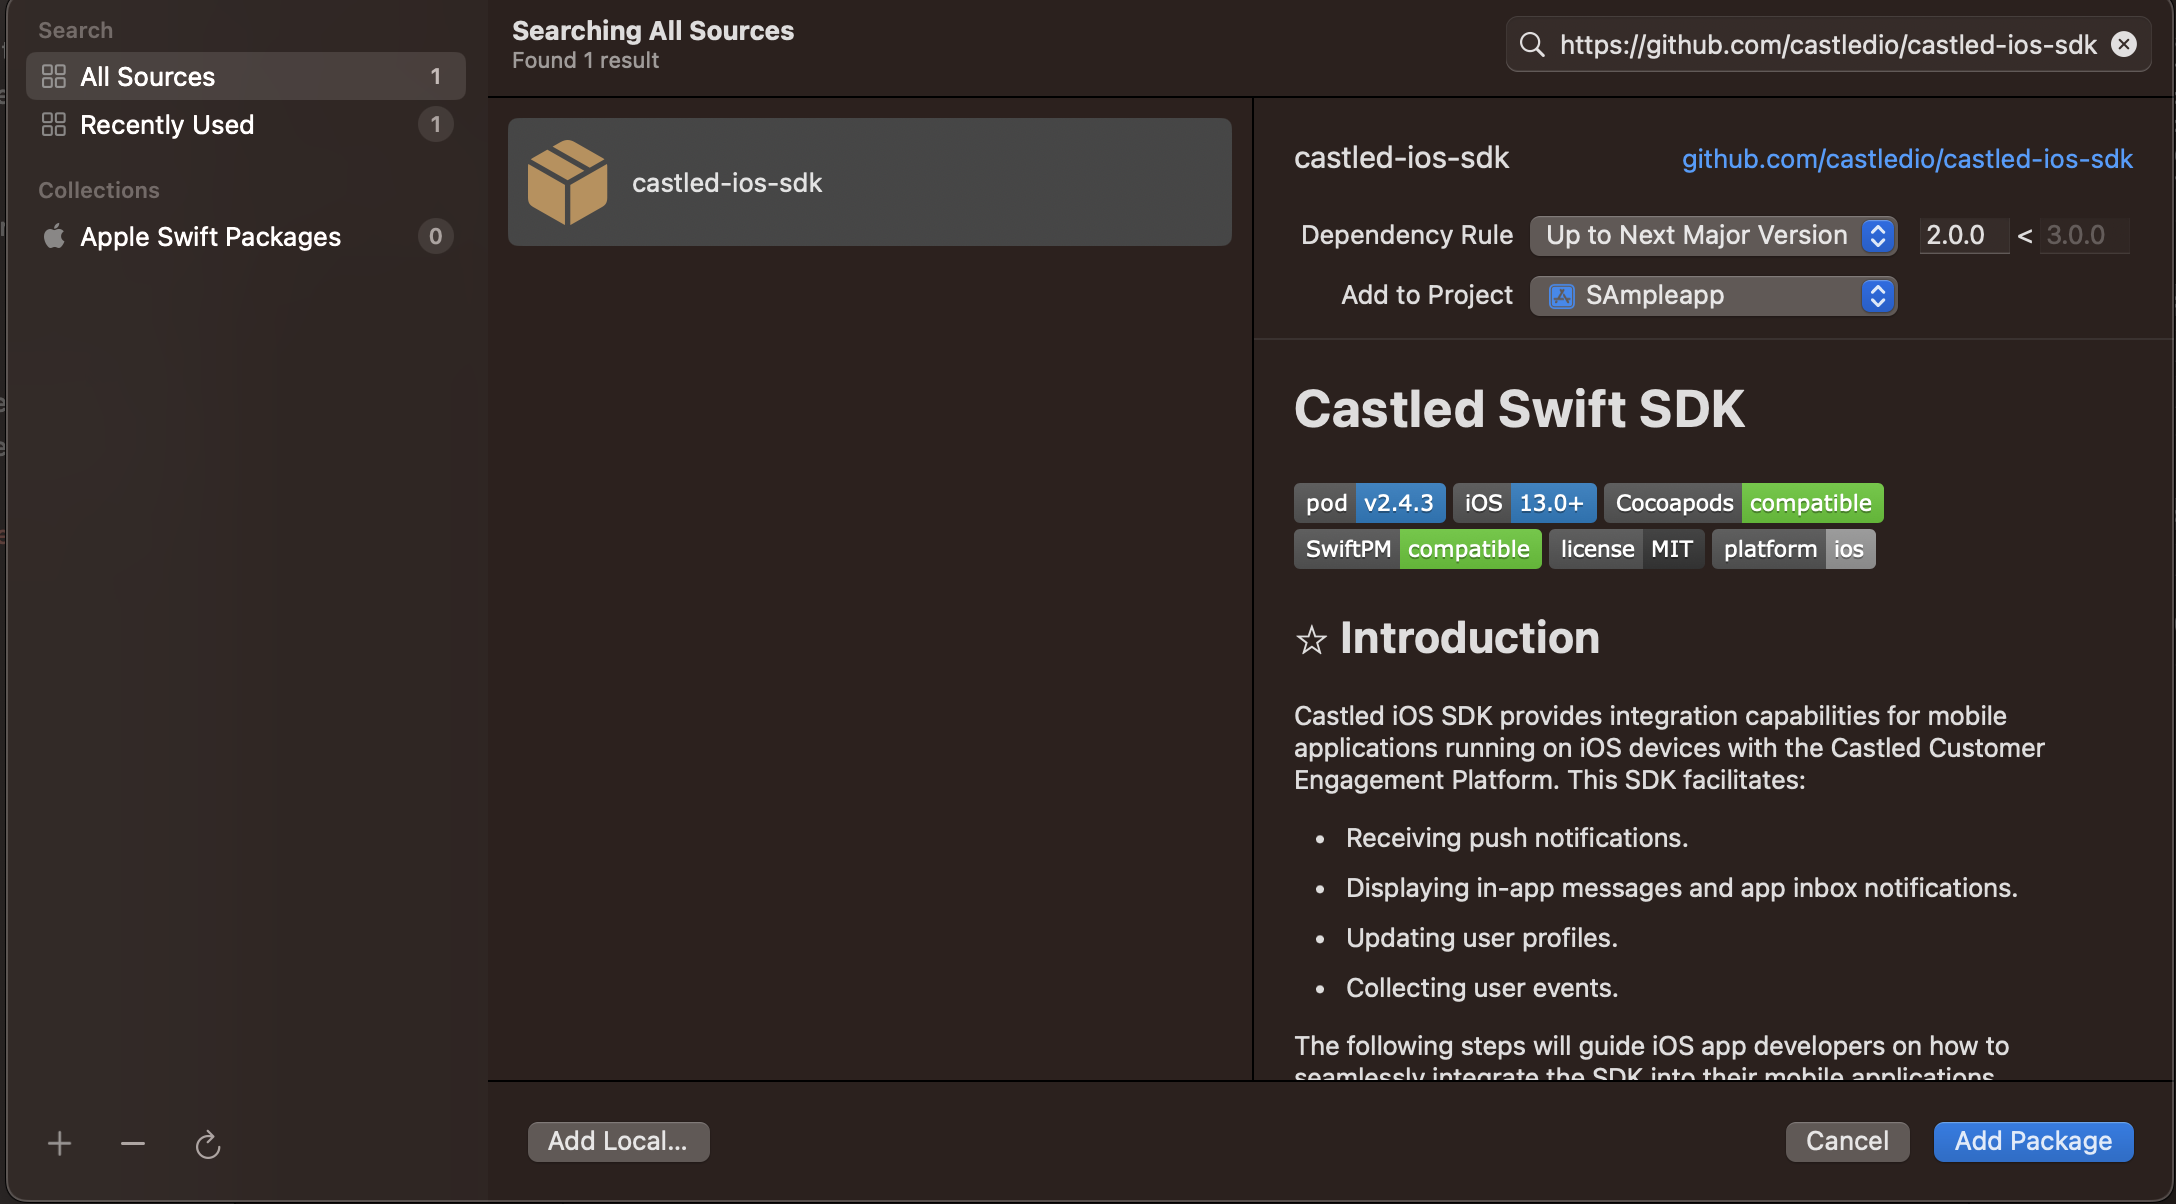
- Navigate to File > Add Packages…
- In the search field of the new window that appears, enter the following URL for the Castled SDK package repository:
- Select the version that you want to integrate into your project. It’s usually best to select the most recent version unless you have specific reasons for using an older one.
- Click Add Package to your project. Xcode will fetch the repository and integrate it into your project.
 Once integrated, make sure to import the SDK module in your Swift files where you want to use it.
Integration via ‘Package.swift’
For package authors or those who prefer a more manual integration process, update your Package.swift file with the following dependencies entry:
Once integrated, make sure to import the SDK module in your Swift files where you want to use it.
Integration via ‘Package.swift’
For package authors or those who prefer a more manual integration process, update your Package.swift file with the following dependencies entry:
Package.swift